
“EXTERMINATE…EXTERMINATE!”
Ugh. I shudder.
The shrill, modulated cheap voice effect screams from my television.
“EXTERMINATE.”
For those of you who don’t know Who, then the Who I refer to, is the Doctor.
Dr. Who.
I don’t mind it, but there are these robot things that yell “exterminate” all the time—those I can’t take.
My kids love it.
And I try to find other things to do while they watch it.
Like paint their school chairs.
I know. Not a great segue. But this will all come together.
I promise.
So, I was reading something from my paint-manufacturer-of-choice, Valspar, where they said 8 million tons of discarded furniture end up in landfills every year.
8 Million.
And most of those because of something minor, like a scratch, a watermark or a ding.
That’s stupid.
Most of you know now that I like old stuff. Making it new again. Reusing. Blah blah.
So we have these school chairs that could use a refreshing. My kids spend plenty of time doing school work, arts and crafts in these things.
They have plenty of life left in them.
Don’t EXTERMINATE.
Let’s repaint.
And give them a theme.

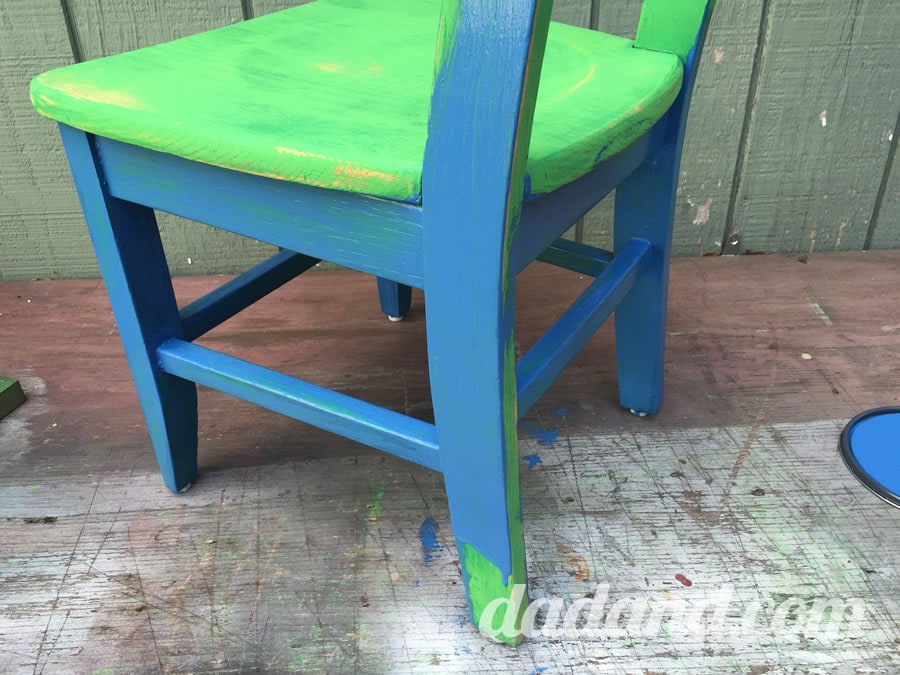
My wife salvaged these chairs from our church. They’re the standard child’s schoolchair, but made from oak, about mid-century. Well-built, we would have hated to see these end up in a landfill. We got five of them, and gave them a coat of regular gloss latex paint to hide the blemishes and stains—but after five or six years of wear and tear, the paint is fairly beat up.

Enter Valspar’s new Furniture Paint. It was made to provide a durable finish that’s resistant to spills, scuffs and stains. Indoor or outdoor use too. They say the paint is oil-enriched, but cleans up with water. So maybe it has the benefits of an oil finish with the simplicity of a latex cleanup? Anyway, I wanted to give this stuff a try. The can says no brush marks, sanding or primering. Let’s see.

We chose a medium to dark blue. Tardis blue, in fact.

So this thing is the Tardis. A police box time traveling machine from the Dr. Who television show. I’m going to customize the child’s chair with the tardis blue paint and some stenciled lettering. Maybe it will make their school time go faster.

The label on the Valspar can said no sanding or primering. I think they mean full-on, heavy sanding. I wanted to smooth out some of the existing finish, so I gave it a scuff anyway. There were some runs in the old paint and some chips that needed attention.

I used a medium-grit sanding sponge to take care of the roundy-round surfaces on the edges of the chair.

For the large, mostly flat areas, I used a vibrating mouse sander with some 120-grit paper to take the shine off.

Before painting, I used compressed air to blow off all the sanding dust, leaving a nice clean surfaced to accept the Valspar Furniture paint.
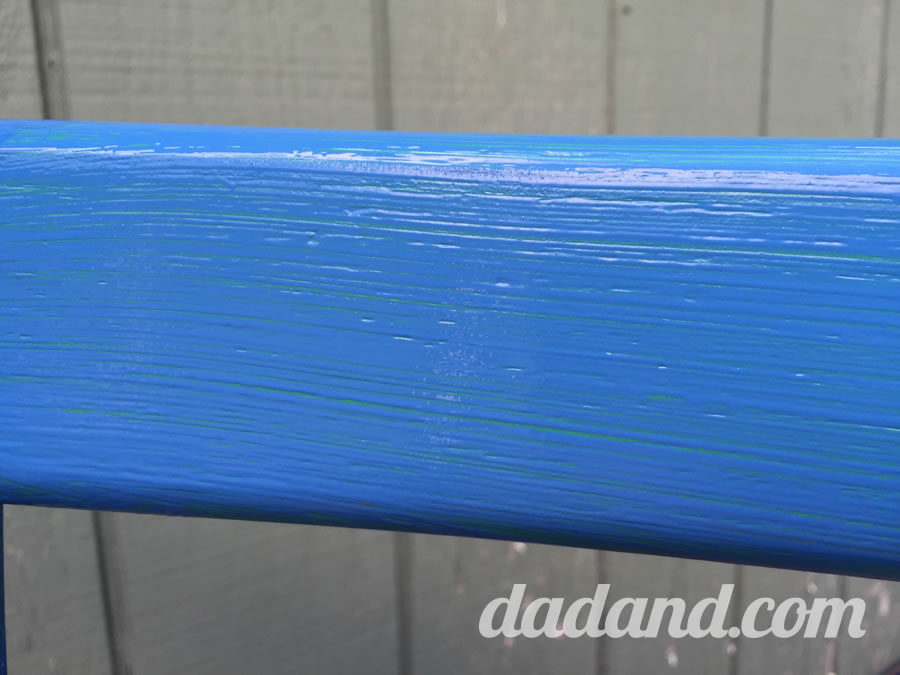
I started by brushing on a coat of the paint in the hard-to-coat areas, working inside out. It looks like I did a poor job of brushing…

…but that’s the way this stuff goes on. There were a lot of brush streaks. And seeing all that old color peeking through. Ugh. The Valspar Furniture paint seems to be a little thinner than their latex paint, but the can promised no brush strokes. We’ll see.
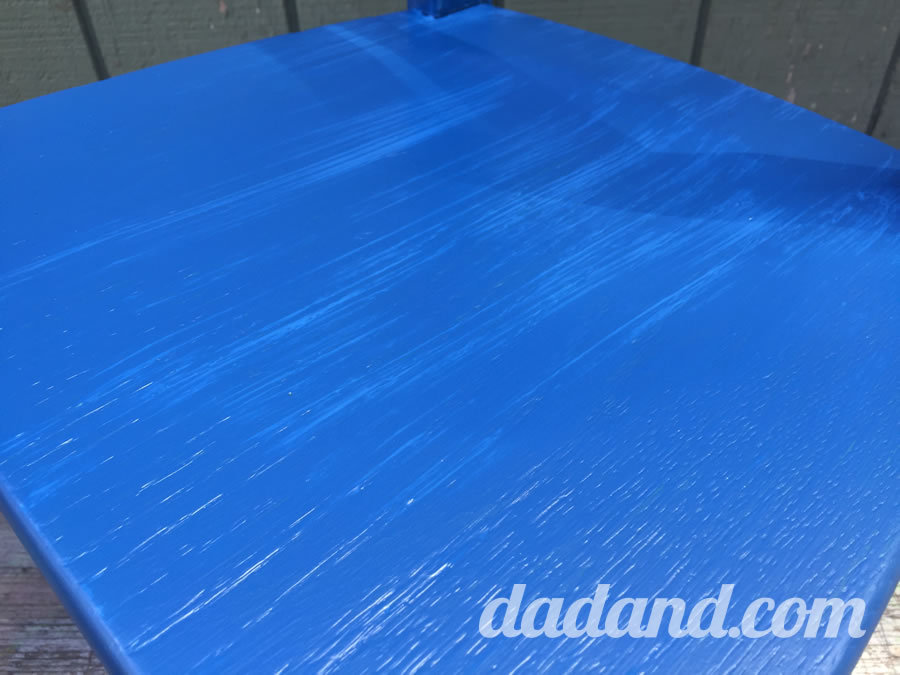
Here’s a close up of the top of the chair. Streaky. I was getting a little worried at this point.

So this is where it got interesting. I literally starting watching paint dry. As it dried, it looked really chalky, but started leveling out at the same time. The brush strokes were disappearing.

Okay. So here’s the results of the first coat. The green color was peeking through, but the finish was level. And the chalky finish went away. It was a nice smooth satin finish. Valspar does recommend two coats…so…
…here goes the second coat. It started covering much better this time.

I still got the wet brush strokes but they leveled out once it started to dry. Valspar recommends that you wait 8-12 hours between coats. So I waited 4 hours. My chair was totally dry to the touch, so I applied the second coat. I’m not recommending you do this—I just couldn’t stretch this project out over a couple of days. Had this been anything other than a kid’s chair, I would have waited.

So 24 hours later everything’s dry. And this is the part where I take the chair from tolerable to “tardis-riffic.” I’m going to letter “Police Box” on the top rung of the back of the chair. I laid down a 2” piece of masking tape.

And I printed this text from my computer on a laser printer. I found the font online for free, it’s called “London Subway.”

I trimmed the paper down to size and applied spray mount adhesive to the back of it. This way it would stick to the masking tape and I can cut it out with a craft knife.

So here’s the part where I wish I just would have gone down to the local sign shop and had a vinyl mask cut. Well, I did, but they were closed on the weekend. I cut out each letter using my x-acto knife and a really sharp blade. Be careful.

So here’s the mask cut. I can just paint right over the paper/tape for some good-looking lettering.

I used a small craft brush and some white sign enamel paint to do the lettering. You could probably use acrylic craft paint too.

It took about three coats of white to get good coverage. This shot shows two coats on the word “police” and one coat on “box” just so you get the idea.

I didn’t let the enamel paint fully dry before removing the mask, so the paint wouldn’t pull away. I let this dry overnight before the kids try to time travel. Or just travel to the next day and use it right away. It came out pretty good. At least good enough for a kid’s chair.

Here’s the finished chair. I was really happy with the outcome. It’s fun and the kids all want to sit in the Tardis chair. The paint dried flawlessly. If you’ve been reluctant to paint furniture, for fear of scuffing, or thinking it won’t stick, give the Valspar Furniture paint a try.
So go ahead. Paint that chair like a tardis. Or that ottoman like R2-D2. Whatever your inner nerd fancies.
Pick up that 80’s modern laminate coffee table on the side of the road and paint a big ‘ol Patrick Nagel girl on it. Go for it.
Nah. Don’t do that one.
The Valspar Furniture paint is about $25 a quart. And a quart will go pretty far.
And get inspired by checking out this Valspar site for color choices, design ideas, even a video showing Charlotte, the chest of drawers, being renewed. Heck they even have paint for your cabinets, something for me to try next time.
Let us know what you paint.
EXTERMINATE!


5 Comments
April
Did you use a sealant with this paint?
Marty
No sealant needed. And I can say after months of use and abuse, the finish has held up perfectly! No chips or scratches.
C Alexander
I’m curious how this paint has held up in a year’s time.
Marty
Hi, thanks for your comment. It has held up really, really well. No chips at all. Very minor scratches, so minor that you’d have to look hard to find them. Still has a glossy finish. And my kids use the chair everyday. I’ve always been reluctant to paint furniture, and cringe when I see painted cabinets (unless they’re old cabinets that came that way). I’m actually going to paint the cabinets in my popup camper with this paint, which are at floor level and more vulnerable to scuffs and scratches from shoes and such. If you use it, just don’t get disappointed as it is applied. It looks horrible as it dries—kind of flat and chalky-looking. But when it’s completely dry it looks great.
C Alexander
Wonderful! I’ll give it a try.