
#SpringisCalling
It calls all right.
It’s calling me out for the almost-criminal neglect of the front of our home during the winter.
It’s not like Winter really prevented me from doing anything.

Dadand North’s winter is certainly a palpable excuse for indifference in entryway landscape maintenance.
But in Florida, I still have to mow the lawn in January. Water plants and pluck weeds, too.
And I probably haven’t done much of that since last summer. But summer here ends…well…this should make it easy to understand:

So read this post now. ‘Cause Spring will be over by like Monday.
Unless you live just about anywhere else.
Anyway. Go outside. Clean it up. Plant some stuff. Be the first. Show up the neighbors. Wear short shorts. Jump off the garage with a bedsheet parachute—it’s Spring!
[Don’t jump off the garage. Pete and I absolutely know that bedsheet parachutes do not work. Also: cactus spines will pierce the sole of your shoe, lightning can be transmitted through a cathode ray tube television and wasps will not drown. ]So what put the pep in my spring step, you ask?
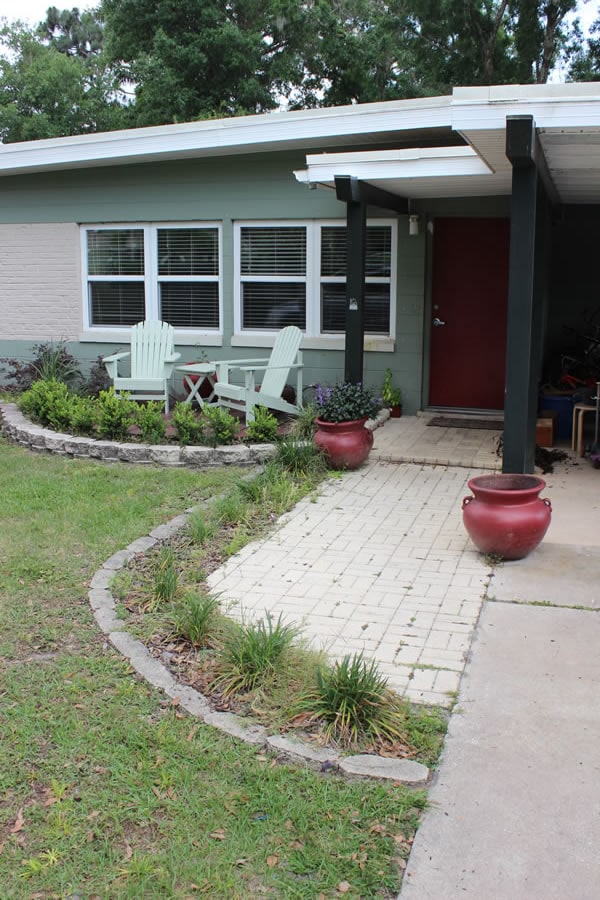
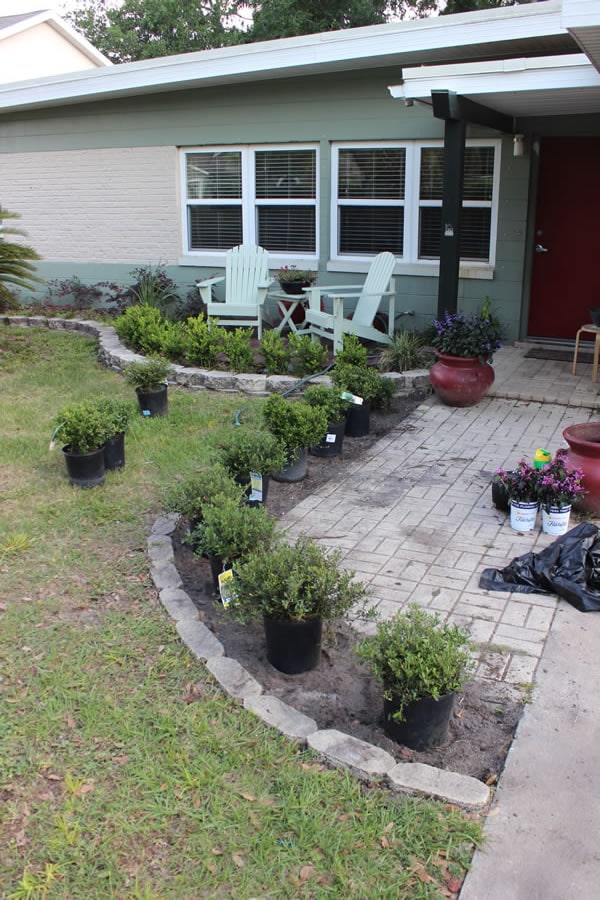
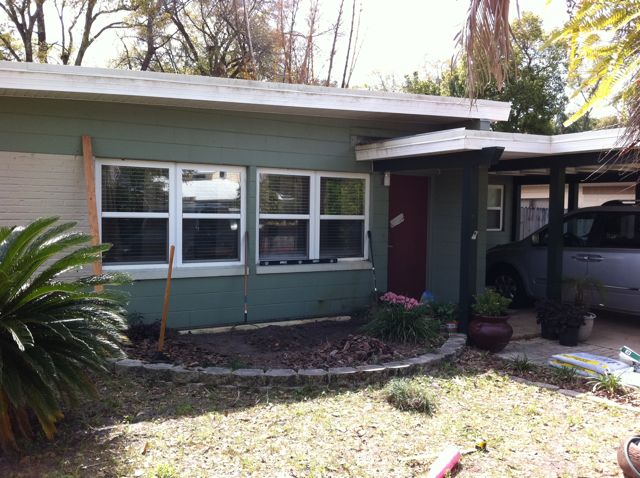
This is what you see on the approach to my front door.

And this is what I see when I approach my front door.
It got me thinking of a bunch of little projects I could do to create some curb appeal, and make my neighbors feel like they have to get out and do the same thing next weekend. In the heat of the summer…suckers.
This is the list of low-budget, high-impact curb appeal projects I came up with:
- Fix the dents and scratches in the front door. Paint it.
- Pressure-wash the soffits, walkways and landscape blocks
- Redo the planting bed
- Paint the containers and replace dead plants
- Add some pathway lighting
- Replace the porch lighting
I was able to complete the door, planting bed container plants and pathway lights, but my pressure washer broke about half-way through. And the porch lighting will probably take weeks of pouring over options before I take all of ten minutes to hook it up.
So. Future posts on fixing a pressure washer and installing a porch light, right?
Let’s go.
Use Bondo to Fix Dents in a Door.
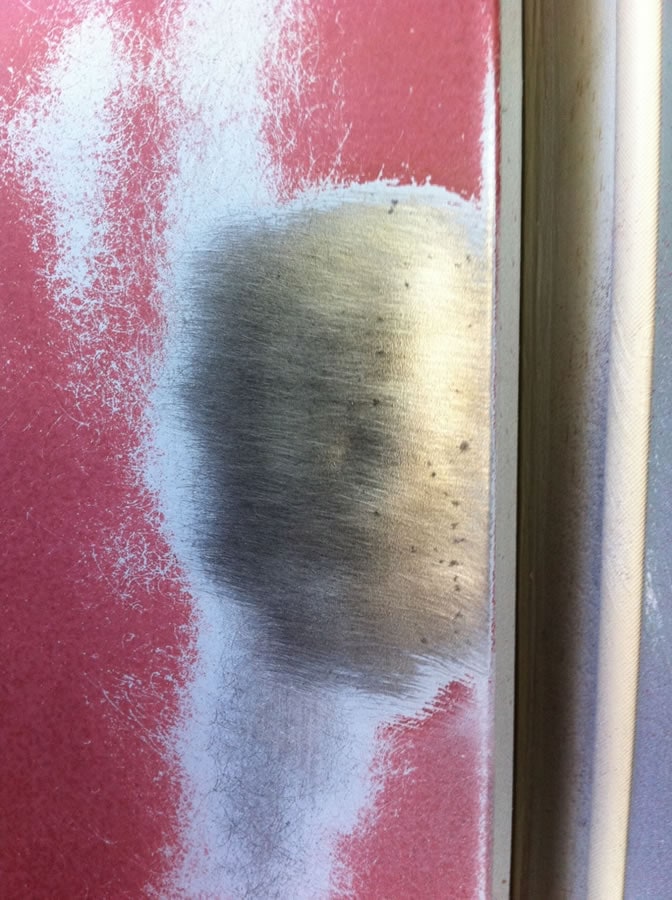
I have a metal front door. Over time, it’s received a fair share of dents and scratches. Moving furniture. Kids. Oversized packages. Head butts from a criminal. (Comment and I’ll tell the story)

Get a sander. I used a 6” orbital sander with 80 grit discs. Sand the entire door. Try to sand down to the metal where you have dents. When you are done it will look something like this.

I taught this dent a lesson with my sander. Right down to clean metal. Bondo sticks best to clean metal.

Aww, this dent wants to fight back. You can see the little circular depression that didn’t sand out. I’ve got something for you.

This is a wire brush on the end of a drill. Make sure you put some goggles on the end of your face so you don’t lose an eye with this tool. Now start grinding and feel free to curse it at the same time.
Wire brush:1, dent: 0.

This is the Bondo Body Filler. (Lowe’s P/N 40188) Good auto body shops use very little of it to fill dents. Bad body shops build quarter panels from it. But this is a door on your house. So just mix it up like the can says and spread it over the dent. Use some Bondo Spreaders. (Lowe’s P/N 186730)
If it’s hot out, it will harden up pretty quick. So work fast.

Here’s some bondo spread on a dent. I applied it well beyond the dent to make sure I only have to do this once. Most of it will sand off.

And here’s my door with about a dozen dents filled. The other areas of gray primer were scratches in the paint that sanded out. I’ll sand now with the orbital sander, first using some 80 grit to knock off the top of the bondo areas, then finish with a 120 grit to feather the bondo areas out.

After about ten minutes of sanding, I ended up here. I used a compressor to blow off the sanding dust (or you can use a vacuum) and then wiped the whole thing down, very quickly, with some acetone. I wouldn’t do that on a car as the acetone could effect adhesion to the bondo, but again, this is a door and I’m painting with some exterior latex.
So the door is ready for paint. I’m not going into that here. It’s painted red again. You’ll see it at the end. But you learned about Bondo. It’ll work on other stuff like wood and fiberglass too.
Plant Stuff Because it’s Spring.
This here’s the meat and potatoes of this post.
I had the scraggly little “giant” liriope here for like ten years. They’ve never gotten bigger. And they’re just too small in scale for this area. I’d rather have something a little larger that I can keep trimmed back to form a little hedge.
And that guarantees me the use of power tools in the front yard to illustrate my superior manliness to all neighbors. Go put your weak little pruners away.
Let me tell you about planting distance. Every plant label has this suggested distance you should plant them apart from each other.
Ignore that. And cut the distance in half.
They never seem to spread out to the full potential and I don’t want to wait until I’m 70 to have a hedge. I’m sure I’ll get some comments about how I’m wrong. But maybe I’ll follow up in a year with my hedge. In your face.

We started by pulling the liriope. They were in good shape, I’m just going to put them where they get a little less sun, in the backyard. My daughter was my helper as we dug out the old weed barrier fabric and a few roots.

I lugged over a couple of bags of manure while my daughter moved plants. My boys snickered in the background about cow poop as I turned it into the soil.
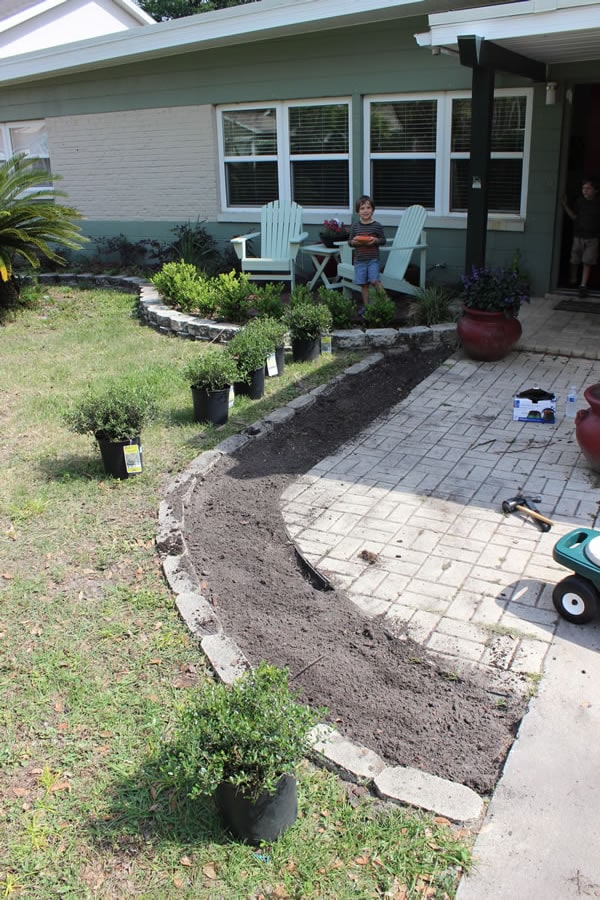
I raked up the bed after manure application and we prepared to layout the plants.
My helper placing everything just right.

Did it take me six photos to tell you what type of plants I got? Yup and Yaupon. Yaupon Holly that is. It says it will get about 2-3 feet wide and about the same height. My Lowe’s only had about 6 of them, so I had to visit another store to get a few more. I don’t see this exact plant variety on the Lowe’s website, but they have similar varieties. They were about $15 each.
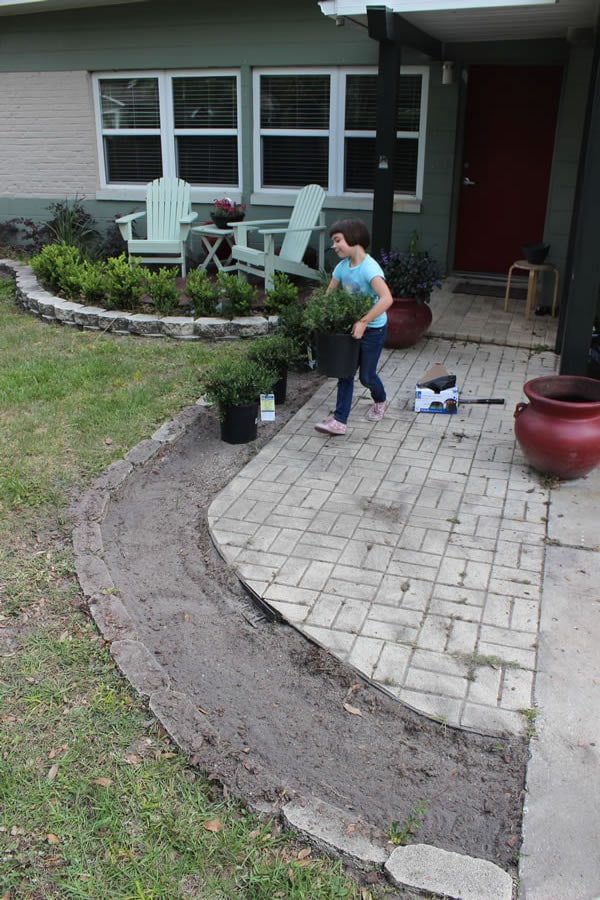
We placed nine plants but I think that ten would make for a better fit.
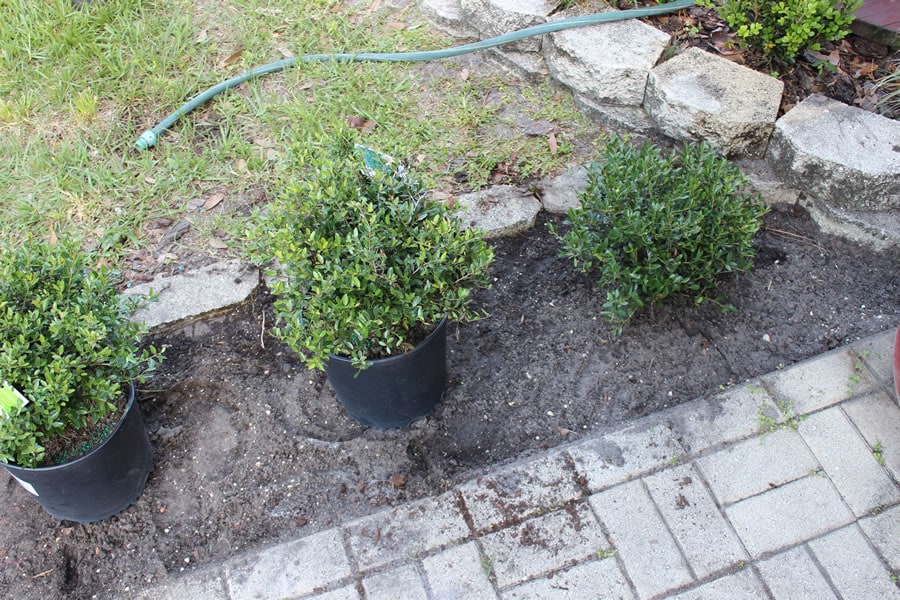
We tried them about 18” apart, although the recommended was 24-36”. We’ll see what happens.

All in the ground. Now for mulch. And lighting. Oh, and I skipped the shots of painting the planters, but you can see that they are nice and shiny now. I used the same color on the pots as I did on the front door. You know how to paint anyway. Right?

I tried some of these solar lights, they had a somewhat modern design that I liked. (Lowe’s P/N 141120)
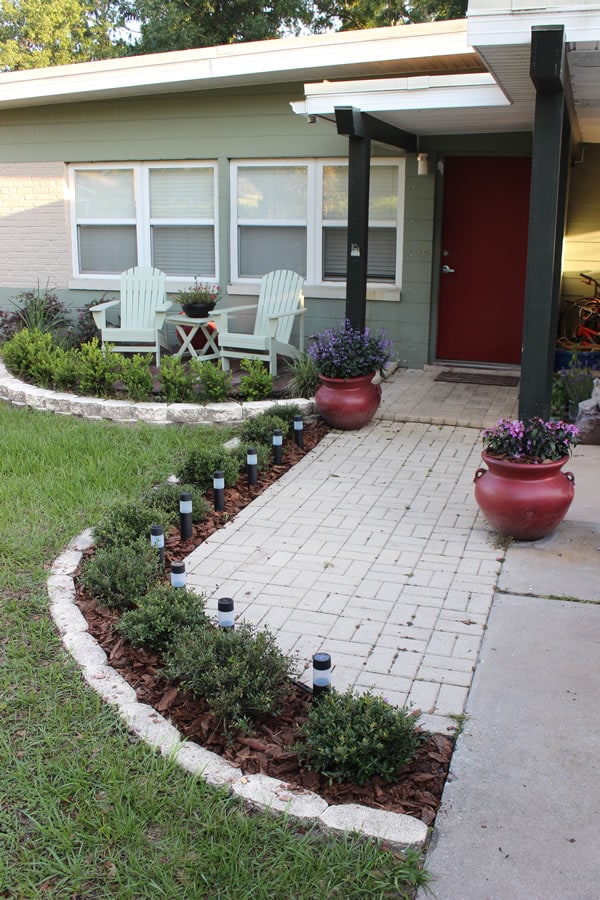
The big finish. I think it looks great!
The new holly shrubs should fill out really nicely. And a splash of color in the newly painted containers. The lights work pretty well, they charged up same day and were still going about midnight—the label said they’d last about 8 hours on a full charge.
I still need to do a few things: fix the pressure washer and take care of the paver walkway. That would also take care of the all the little weeds growing in the pavers—I’m not much for weedkiller products. And then I can start looking for a new porchlight.
All in all I spent about a two and a half days doing this. Although I spread it out over two weekends. And I probably have about $220 into everything you see here—the plants, mulch, manure and lighting.
I did have a can of bondo and the paint for the front door already, so that could set you back about $50 if you include sandpaper for your sander.
Well Spring called and I answered. What are you going to do for some curb appeal? Share it with us. Take a pic, then post it to our FB wall with the #SpringIsCalling hashtag,
![]()
Spring is calling! Stay on track this spring with special values, tips and how-to’s from Lowes: http://www.lowes.com/improve
Disclaimer
“In accordance with the FTC Guidelines, I am disclosing that I received compensation from Lowe’s for my time and participation in the Lowe’s Creative Ideas Influencer Network. Although we have a material connection to Lowe’s, any publicly stated opinions of Lowe’s and their products remain our own.”


3 Comments
Hannah C
Love the change. Looks awesome! Thanks for sharing!
Lindsey
Wait, am I the only one who wants to read around the criminal and head butts?!?!
Alos, found your site for dropping the screw down the dryer lint duct.. although I don’t know what is actually down there. I just know it is something!
I did what I could before needing to consult the internet gods.
I’ll let you know how things go!
Rayne
I also REALLY want to know about the criminal that head butted the door?
BTW, The update looks GREAT!