It’s filter week here at Dadand.
First I’m changing oil filters, now I’m applying photo filters.
During my first few years of using Photoshop, it seemed all I heard about was filters.
“Hey man what filter did you use?”
Everyone was “filter-happy.”
Filters were something anyone could do easily. Open a photo, apply the filter and you’re out.
That ease of use led to some really horrible looking work. Honestly, it led to a filter aversion I have to this day.
Solarize that.
Well, as an official Adobe Photoshop Elements user-blogger-person, I wanted to take another look at filters and maybe show how they can be used in a good way. Oh, and how easy they are to apply. I’m sure many of you will “filterphiles” might debate the former, but you can’t contest the latter—it really is easy.
So if you’re thinking about that dreamy-themey-scrapbooky-diy-self-published-coffee-table-book of cats in costume, then go somewhere else while I get all filter snob on a photo I took while visiting Adobe in San Francisco.

Here’s the original shot. Yeah, it was overcast and cold. I didn’t want to play with my camera settings, just snapped a quick fully-auto shot. I loved this building. Cast concrete, wood, tile. And nice job with the type, National Park Service. Love it.
Applying Filters in Guided Mode
I decided to do this in guided mode, since it offers a chance to learn the “whats” and “hows” while you work by taking you step-by-step through the process.
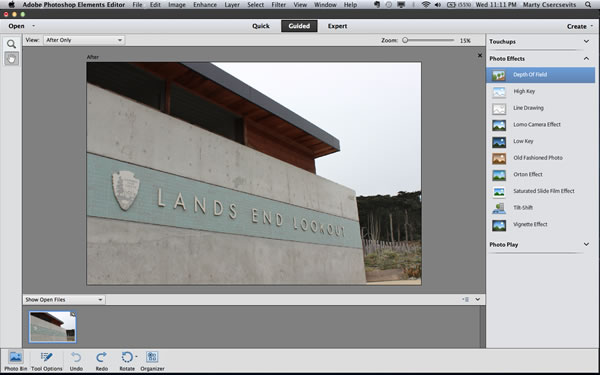
All of the filters/effects are located on the right side of the screen in guided mode. Here you can see a number of photo effects. I’ll try most of them, at least the ones I think would work with this photo. And I’m trying to use the same shot in each instance so you can really see the differences each effect produces.
Depth of Field

The first filter I’m going to try is depth of field. It basically simulates/exaggerates an extreme depth of field effect you can get by using different lenses and apertures on your camera. But if you have a point-and-shoot or camera phone, then you need this filter.
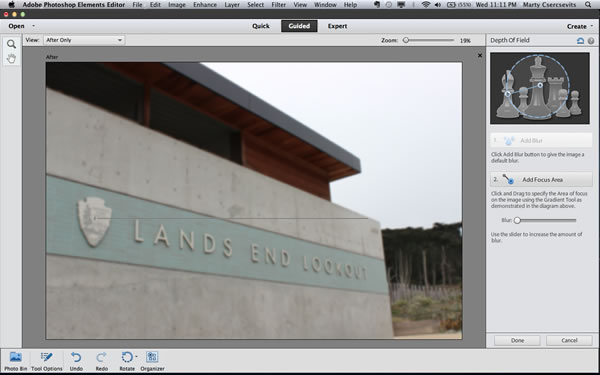
Next, I added the focus area. Drag the tool across the area you want to be “in focus”. You can just see the little gray line on screen. I dragged left from the logo on the wall to right, about where the wall stops.

Bam. Instant depth of field. Makes me look all photographer-like when my fingers were too cold to start changing lenses and adjusting my camera.
Line Drawing

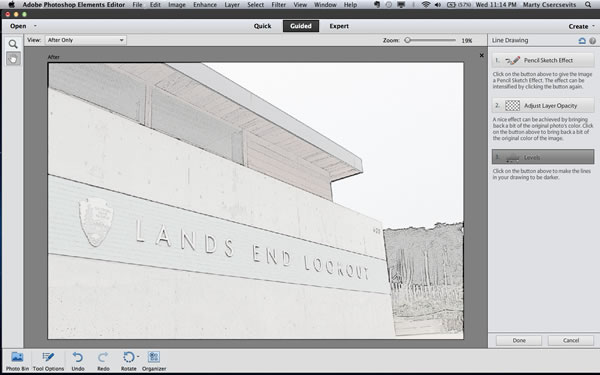
Now I’ll try Line Drawing. It does a decent job of turning your shot into a line drawing. Like a pen or pencil drawing. Lines. Yeah. Lines. Line drawing. A line drawing.
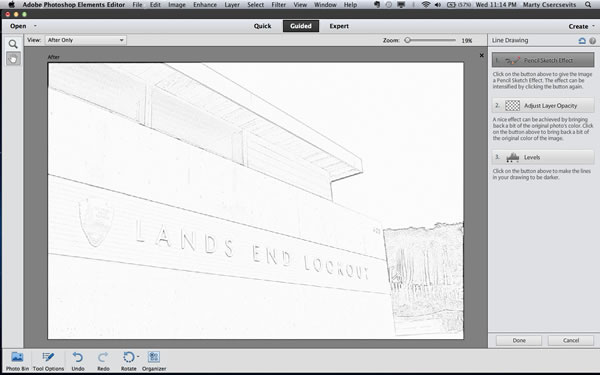
The Pencil Sketch effect starts with a click of the button. The more you click the more pencil-y it becomes. I think this was just two clicks. I treaded (traced) lightly. Like a 2 HB pencil. Ok, that was a drawing joke.

Now bring back some of the original photo using a layer opacity adjustment. This’ll let just a bit of the original photo “peek through” to add a bit of color and value.
Lomo Camera Effect

The Lomo Camera effect results in highly saturated color, sometimes arbitrary color, often with distortion and a vignette effect. Okay forget all that artsy speak and just try it.
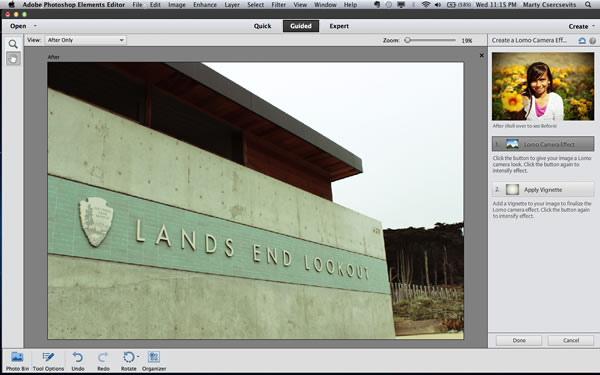
This couldn’t be easier. Click the Lomo Camera Effect button. Need more Lomo? Click it again. And again.
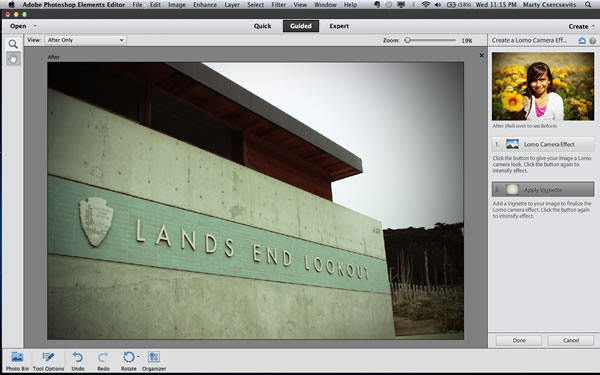
Truly Lomo this thing out by applying a vignette. No not the stuff for your salad. This applies some dark areas around the edges and corners of your shot.
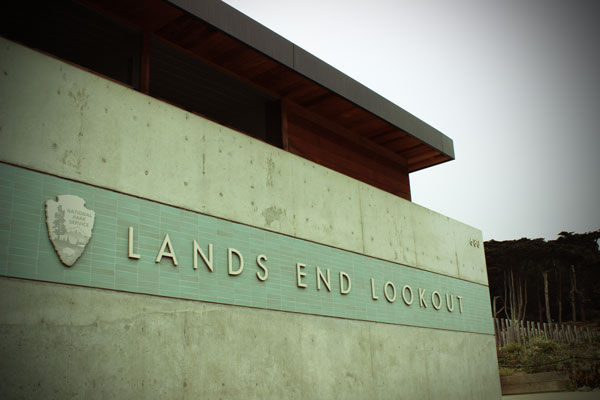
There you go. It’s all Lomo. This has to be the most hipster-friendly effect in the arsenal of tools known as Photoshop Elements Effects. Now throw away your plastic camera. And get a haricut. Hipster.
Low Key

Low Key basically give your photo a really contrasty look. It messes with the saturation (intensity) of the color for a dramatic effect.
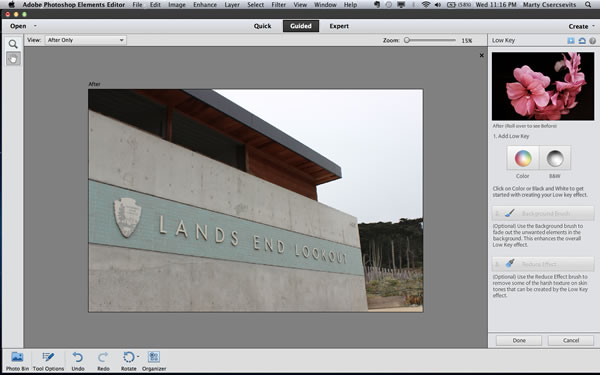
Start by dding the effect and select whether you want it to be in color or black and white. I tried color.
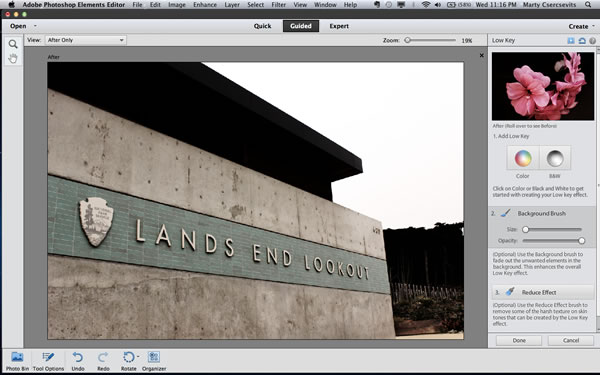
You can see the darks got really dark and the lights really light. The tones in the middle (everything but really dark and really light) are accentuated. Next I’ll use the background brush to adjust some of the background elements…
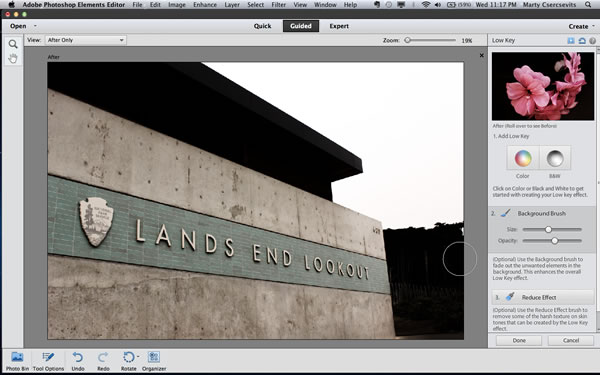
Here I’m using the Background Brush to paint out some of the distracting elements in the background. You can adjust the size of the brush and the opacity (does the brush lay down solid, or can you see through it?)

This filter gives you the option to reduce the effect in some areas. I wanted to bring back some of the detail in the reveal of the roof and the wood textures, so I used the Reduce Effect brush which “erases” the effect.
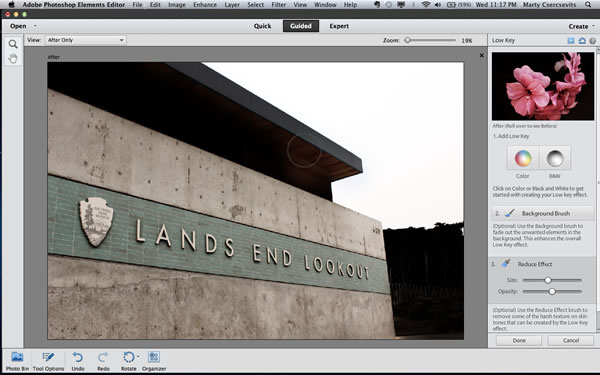
Here you can see I’m erasing some of the effect in that wood detail, and the edge of the roof now has some definition again.

Here’s my final using the Low Key effect. I could have spent some more time on the roof, but you get the idea. I like this contrasty look. Kinda like the movie 300. I shoot a lot of vehicles at car shows, and this filter would really look great on some classic cars too.
Old Fashioned Photo
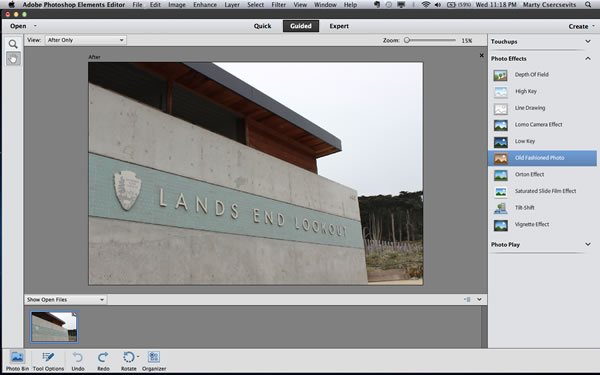
Let’s try the Old Fashioned effect. Take a photo of the whole family dressed up like cowboys and can-can girls from the old west, in a saloon, with someone wearing a derby hat, then apply this filter for some sepia-toned greatness.

It all starts with changing the photo to black and white. There are three options, but I stuck with the first: newspaper.
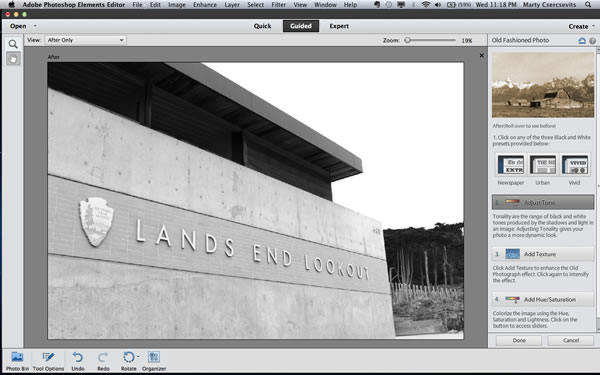
Adjusting tone basically messes with the contrast, condensing darks and lights in your photo to add drama.

Old photos look all grainy and crappy right? Well, sometimes. Click the “Add Texture” button enough times and your photo will be crackly and grainy. I just didn’t want to go to “old”.
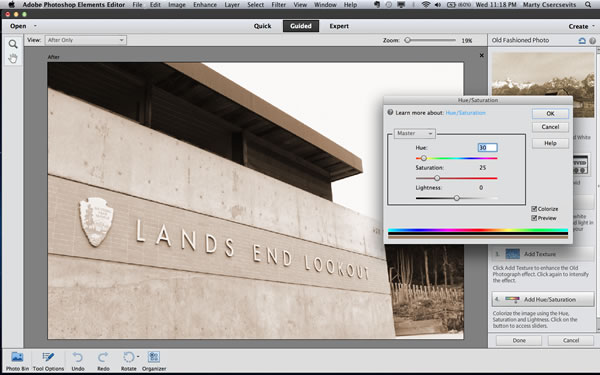
Here’s the wow factor of the Old Fashioned effect. By adding the hue/saturation adjustments, you can colorize your photo—by choosing a color, making the color more intense and making the overall photo lighter or darker. I wanted to keep it classy and just add a hint of color.

Nice. Here’s the final Old Fashioned shot. You could get all artsy and frame this sucker. But if your photo is the western shot I spoke of earlier, than the frame needs to be nailed together with cut nails and have some kind of wrought iron embellishments. And a horseshoe. And hung over the spittoon. Does spittoon have two “t”s?
Orton Effect

The Orton effect gives your photos a dreamy feel, perfect for 80s wedding photography, sleeping cat photos and sometimes a cool building.
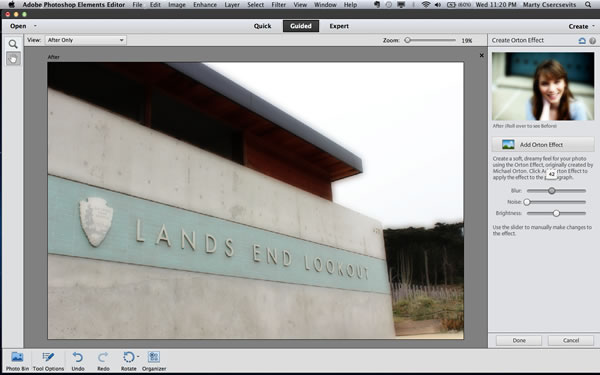
Click the “Add Orton Effect” button and then the first adjustment adds a blur effect to the photo. Drag the “Blur” slider to to the right to increase the dreamy-ness. If your picture is of a supermodel, drag it all the way to the right—cause you are dreaming.
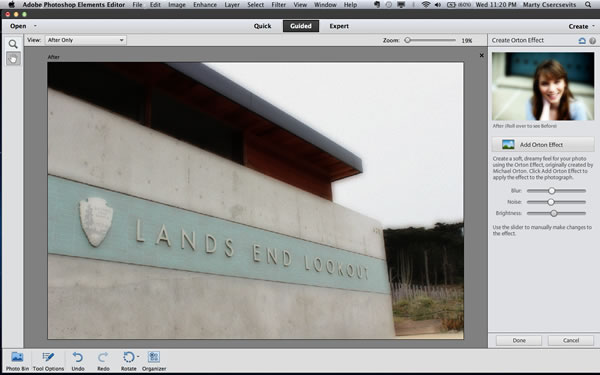
Next, adjust the Noise and Brightness sliders to get that fuzzy “I once visited this place in a past life” kinda feel.

You’re getting very sleepy. Dreamy. Ummm, yeah…here’s the final photo with the Orton Effect in full effect. Now don’t walk towards the light, and move to the next filter…
So that’s it. A few filters here. And quite a bit more in Adobe Photoshop Elements. Try some out, let us know what you think. And all you filter snobs, lemme have your comments, or visit the Adobe Photoshop Elements Facebook Page and share your filter work.
And here’s the TL;DR version.
Filters are fun.


