I had been itching all week to work on this thing, one, to get the stuff out of my front yard, and two, I had to look at it every night this week when I came home from work and just wanted it done.
This week gave me some time for the PT to dry out some, so it’ll shrink less and practically be ready for stain as soon as I screw it down (provided it passes the porosity test).
I started in on laying the decking. I laid out all the boards in the yard, bark side up, and picked each one for its rightful resting place. There were a few that had some gnarly knots near the end and wanted to ensure they’d be on the radius side of the deck so they’d get chopped off.
Okay, 1-10, just like that.
Snap some chalk lines, measure 2” in from the side of each board along the chalk lines, pre-drill with countersink and then impact-driver-with-torx-bit-to-3-inch-screw-them-in. I don’t need to tell you that you don’t have to space the deck boards, right? Merrypad knows.
Now for the radius.
Here’s a trick for making a nice even curve when you don’t have tolerances required to the thousandth—3 screws and a piece of ½” pvc or wooden trim like screen molding or quarter-round. (I have a million tricks for templating from my days as a fabricator, enough that I will probably dedicate a post to them).
I measured 16” back from the center and sides of the retaining wall, drove some screws (on the side that will be cut off), and pushed the pvc right up to them and traced the edge with a carpenter’s pencil. No Sharpie, I will be staining. Use pencil.
Notice I said Sharpie (® or ™ here). Not marker. There is a time and place for a Sharpie and a pencil. Again, a post-worthy topic in itself.

One of the twins learned how to delete photos from my iPhone so this post will only get diagrams and an “after” photo. And I know you love my notepad I lifted from a recent trip to the tire store, where they obviously secured it from AAMCO.
I cut this with my beloved Bosch Jigsaw. This has cut many the hole for a woofer my friend. It has a cast base, uses t-shank blades and is pure awesome with a cord. I’ve had this tool for over 16 years. I will have it until I die.
Right, so jigsaw, 4” blade—one radius cut.
I pulled out my combo fixed/plunge router with a 3/8” round-over bit and took the mean side off the top of the freshly-cut deck. Finish with a light belt/orbital sanding and stain time.
Let me tell you, staining a deck is the only time you are allowed to use those painting pads. They are gimmicks for those who can’t use a brush to edge around stuff. Men use brushes, unless it’s a deck, ‘cause that’s too much work, a roller isn’t right for it and because I get to throw the damn pad out after I’m done. So free pass for decks.
Sweep deck real good. Pad on pole. Transparent “redwood” stain in a single even coat, keeping a wet edge. Wait 24 hours, second coat.

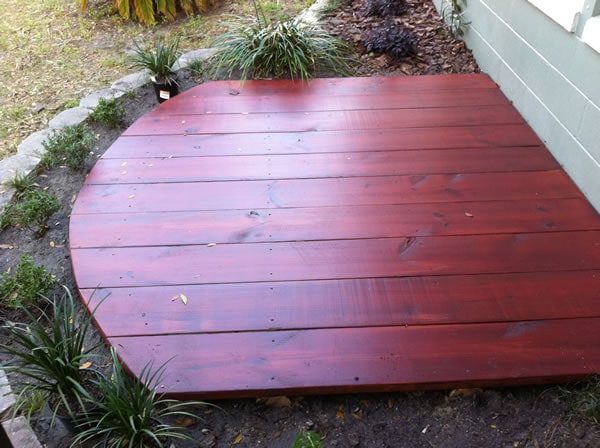
Deck is all done. Fairly good shot of the radius edge and the transparent redwood stain.
Keep kids off for 72 hours.

Sturdy enough for ninja moves, twins and a one-year-old.


2 Comments
Tina
Nice Job, Marty! Great article! I love the stain… I wish I could get out in the yard. Had a little snow yesterday. Spring is in the air though! Getting ready for my veggie garden. Funny one of the twins deleted photos:) Well, not so funny!